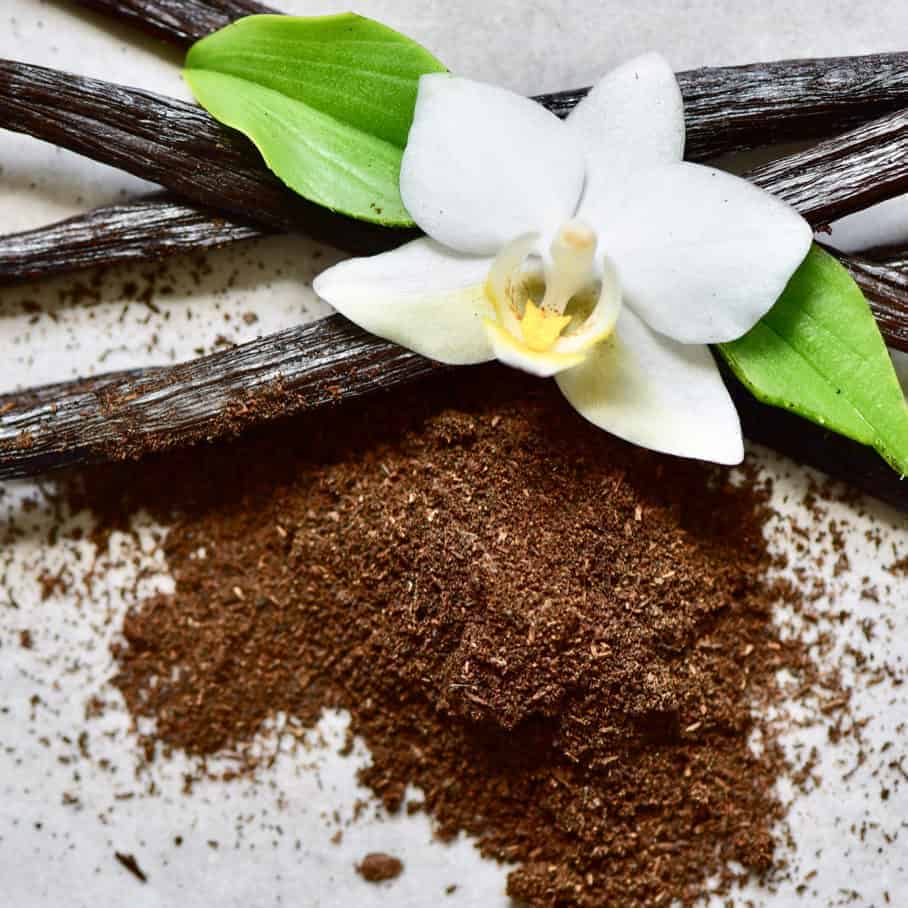
How to Make Vanilla Powder: Zero-Waste & Potent Flavor Boost
Are you ready to elevate your culinary creations with an intense, pure vanilla flavor that stands up to high heat and leaves no waste behind? Learning to create your own vanilla powder at home is a simple yet revolutionary step for any passionate cook or baker. Far more potent than standard vanilla extract and boasting a robust, deep aroma, homemade vanilla powder ensures you get every last bit of value and flavor from those precious vanilla beans. This guide will walk you through the incredibly easy process of **diy how to make vanilla powder**, transforming whole pods into an aromatic, versatile ingredient that will redefine your perception of vanilla.
Why DIY Vanilla Powder? Unlocking Pure Flavor & Zero-Waste Benefits
The world of vanilla offers an array of options, from extracts to pastes and whole beans. However, homemade vanilla powder stands out for several compelling reasons, making it a superior choice for many applications.
*
Unmatched Potency & Flavor Stability: Unlike vanilla extract, which contains alcohol that can evaporate during baking and cooking, vanilla powder retains its full flavor integrity even under high heat. This means a more pronounced and consistent vanilla taste in your baked goods, custards, and sauces. You'll find that a little goes a long way – typically, just 1/2 teaspoon of homemade vanilla powder can deliver the same robust flavor as a full tablespoon of extract, making it an incredibly efficient flavor boost.
*
Embrace Zero-Waste Cooking: One of the most significant advantages of making your own vanilla powder is its zero-waste nature. Often, when recipes call for vanilla beans, the seeds are scraped out, and the pod is discarded. This method utilizes the entire vanilla pod, ensuring that not a single shred of those expensive, aromatic beans goes to waste. It’s an economically smart and environmentally conscious approach to enjoying vanilla to its fullest.
*
The Ideal Alcohol-Free Alternative: For those who avoid alcohol due to dietary restrictions, religious beliefs, or personal preference, store-bought vanilla extract often poses a challenge. Homemade vanilla powder offers a pure, alcohol-free solution, making it perfect for children's treats, specific diets, and anytime you need a clean vanilla flavor without any alcohol content.
*
Versatility Beyond Expectation: While excellent in traditional baked goods like cakes, cookies, and custards, vanilla powder's applications extend far beyond. It can be stirred into hot beverages like coffee or tea, blended into smoothies, sprinkled over oatmeal or yogurt, used to make aromatic vanilla sugar, or incorporated into savory sauces to add a subtle depth. The possibilities are truly endless, allowing you to
Unlock Pure Vanilla Flavor: Make Your Own Powder for Any Recipe.
Essential Tools & Ingredients for Your Homemade Vanilla Powder
Embarking on your journey to create homemade vanilla powder requires minimal ingredients and equipment, most of which you likely already have in your kitchen.
*
The Star Ingredient: Whole Vanilla Pods
The foundation of your vanilla powder is, naturally, vanilla pods. For the best results, opt for high-quality whole vanilla beans. While Grade A (gourmet) beans are plump and moist, Grade B (extract grade) beans are drier, often more affordable, and perfectly suited for drying and grinding. The specific variety – Madagascar (rich, creamy), Tahitian (floral, fruity), or Mexican (smoky, bold) – will subtly influence the final flavor profile of your powder, so feel free to experiment. Buying in bulk can also significantly reduce the cost per bean, making this DIY project even more economical.
*
Key Equipment:
*
Baking Sheet (optional): Necessary if you choose the oven-drying method. Line it with parchment paper for easy cleanup.
*
Oven (optional): For a quicker drying process.
*
Spice Grinder or Coffee Grinder: This is the most crucial piece of equipment. To achieve a truly fine, consistent powder, a dedicated spice or coffee grinder is far more effective than a food processor. A fine grind ensures optimal flavor dispersion and a pleasant texture in your finished dishes. If you use your coffee grinder, make sure to clean it thoroughly before and after to avoid cross-contamination of flavors.
*
Airtight Container: For proper storage of your finished vanilla powder.
Step-by-Step Guide: How to Make Vanilla Powder from Scratch
The process for **diy how to make vanilla powder** is remarkably straightforward, involving just two primary steps: drying and grinding.
Step 1: Drying Your Vanilla Beans (The Foundation of Fine Powder)
The absolute key to successful vanilla powder is ensuring your vanilla beans are *completely* dry and brittle. If they retain any pliability, they won't grind into a fine powder. You have a few methods to achieve this:
*
Method A: Air Drying (The Natural Way)
If you're in no rush, this is the most hands-off and natural method. Simply spread your vanilla pods out in a single layer on a clean, dry surface, such as a wire rack or parchment-lined tray. Ensure good air circulation around them. Depending on your climate and humidity levels, this process can take anywhere from 1 to 4 weeks. The beans are ready when they are stiff, brittle, and snap cleanly when bent, rather than bending or feeling pliable.
*
Method B: Oven Drying (Faster & Controlled)
For a quicker approach, the oven method provides more control.
1. Preheat your oven to the lowest possible setting, typically around 50°C (120°F) to 75°C (170°F).
2. Arrange your vanilla pods in a single layer on a parchment-lined baking sheet, ensuring they don't overlap.
3. Bake for approximately 60 to 90 minutes. Keep a close eye on them to prevent burning.
4. The beans will still be somewhat pliable when you first remove them from the oven. Allow them to cool completely at room temperature. As they cool, they will become rigid and brittle, indicating they are ready for the next step.
*
Method C: Microwave (Use with Caution)
While some sources mention microwaving as an option, it's generally advised to proceed with caution. Microwaving can quickly over-dry or even burn the delicate beans, potentially compromising their flavor. If you choose this method, microwave in very short bursts (e.g., 15-30 seconds), checking frequently and allowing them to cool and become brittle between bursts. Many prefer the slower, more natural methods to preserve the complex aromatic compounds.
Regardless of the method, the crucial indicator of readiness is that the vanilla pods are dry enough to snap cleanly rather than bend.
Step 2: Grinding to Perfection (Unlocking the Aromatic Gold)
Once your vanilla pods are perfectly dry and brittle, it’s time to transform them into aromatic powder:
1. Break the dried vanilla pods into smaller, manageable pieces (1-2 inches) if they are very long. This helps your grinder process them more efficiently.
2. Place the broken pieces into your spice or coffee grinder.
3. Grind the pods in short pulses. Stop and shake the grinder occasionally to ensure even grinding. Continue until you achieve a very fine, consistent powder. You want a texture similar to confectioners' sugar or fine sand, with no discernible large pieces.
4. If you have a large batch, grind in smaller portions to avoid overloading the grinder and to achieve a finer texture. If you notice any larger fragments after grinding, you can sift the powder through a fine-mesh sieve and re-grind the coarser pieces.
5. Allow the powder to cool slightly before storing, as the grinding process can generate a little heat, releasing those beautiful volatile oils.
Storing Your Homemade Vanilla Powder for Lasting Freshness
Proper storage is key to maintaining the potency and aroma of your freshly made vanilla powder.
*
Airtight Container: Transfer your vanilla powder to a clean, dry, airtight glass jar or container. This prevents moisture and air from degrading its quality.
*
Cool, Dark Place: Store the container in a cool, dark cupboard or pantry, away from direct sunlight, heat, and humidity.
*
Avoid Refrigeration: Do NOT refrigerate your vanilla powder. Refrigeration can introduce moisture, causing the powder to clump and potentially affecting the delicate essential oils and overall flavor profile.
*
Longevity: When stored correctly, homemade vanilla powder can maintain its potency and exquisite flavor for up to a year, much like other dried spices. Labeling your jar with the date of creation is a good practice.
Creative Uses & Expert Tips for Your Potent Vanilla Powder
Now that you know how to make vanilla powder, here’s how to integrate this incredible ingredient into your culinary repertoire:
*
Vanilla Sugar: Mix a few tablespoons of vanilla powder with granulated sugar in an airtight jar. Let it sit for a few days, shaking occasionally, to create fragrant vanilla sugar perfect for baking, sweetening coffee, or dusting on desserts.
*
Baking Brilliance: Substitute vanilla powder for extract in any recipe. Remember the potency ratio: 1/2 teaspoon of powder for every 1 tablespoon of extract. This is especially fantastic in dry mixes, meringues, and delicate batters where liquid content needs to be minimal. Perfect for fluffy Japanese-style pancakes, as seen in
DIY Vanilla Powder: Simple, Alcohol-Free & More Potent Than Extract.
*
Beverage Booster: Stir a pinch into your morning coffee, hot chocolate, or tea for an instant gourmet upgrade.
*
Breakfast Bliss: Sprinkle over oatmeal, yogurt parfaits, or fresh fruit for a touch of elegance and flavor.
*
Homemade Whipped Cream: Add vanilla powder directly to heavy cream before whipping for intensely flavored, stable whipped cream.
*
Savory Surprises: Don't limit it to sweets! A tiny pinch can enhance the flavor profile of certain savory dishes, like sweet potato purees or even some chicken glazes, adding a subtle warmth.
By embracing **diy how to make vanilla powder**, you're not just creating an ingredient; you're unlocking a new level of flavor and sustainability in your kitchen.
Conclusion
Making your own vanilla powder from scratch is a rewarding experience that offers a wealth of benefits. It’s incredibly simple, inherently zero-waste, provides an unparalleled potent vanilla flavor that withstands high heat, and offers a pure, alcohol-free alternative to extracts. By following these easy steps, you can transform whole vanilla pods into a versatile, aromatic powder that will elevate your baking, beverages, and culinary creations to new heights. Say goodbye to wasted pods and hello to an intense, pure vanilla experience that will impress every palate. Give it a try – your taste buds (and your budget) will thank you!