Unlock Pure Vanilla Flavor: Make Your Own Powder for Any Recipe
Vanilla, with its intoxicating aroma and rich, comforting taste, is a staple in kitchens worldwide. From delicate pastries to creamy custards and comforting beverages, its presence elevates every dish. While vanilla extract is the most common form, an often-overlooked secret ingredient—vanilla powder—offers an intensity and purity that can transform your culinary creations. Imagine a versatile, potent vanilla solution that’s entirely zero-waste, alcohol-free, and surprisingly simple to create at home. This guide will walk you through the magical process of *diy how to make vanilla powder*, unlocking a new dimension of flavor for your pantry.
Why Embrace Homemade Vanilla Powder? The Unrivaled Benefits
Diving into the world of homemade vanilla powder isn't just a fun kitchen experiment; it's a game-changer for anyone passionate about flavor and sustainable living. This concentrated ingredient offers several distinct advantages over its liquid counterparts.
Unparalleled Potency and Flavor Profile
One of the most compelling reasons to make your own vanilla powder is its superior potency. Unlike vanilla extract, which is steeped in alcohol, vanilla powder consists of 100% pure, ground vanilla bean. This means a little goes a long way. You'll often find that just half a teaspoon of vanilla powder can deliver the same robust flavor as a full tablespoon of extract. The alcohol in extracts tends to evaporate during the cooking process, taking some of that precious vanilla flavor with it. Vanilla powder, on the other hand, maintains its deep, aromatic essence even when subjected to high heat, ensuring your baked goods and cooked dishes are infused with an unwavering vanilla richness.
Zero-Waste and Cost-Effective
If you're someone who appreciates sustainability and getting the most value for your money, homemade vanilla powder is a dream come true. Many recipes call for vanilla beans, asking you to scrape out the caviar and discard the pod. This traditional method, while delicious, can feel wasteful, especially given the premium price of vanilla beans. By learning *diy how to make vanilla powder*, you utilize the entire pod – skin and all. This not only maximizes your investment but also aligns with zero-waste principles, ensuring not a single bit of those precious beans goes to waste.
A Perfect Alcohol-Free Alternative
For individuals who abstain from alcohol for dietary, religious, or personal reasons, traditional vanilla extract poses a challenge. Vanilla powder provides an excellent, natural, and equally flavorful alternative. It delivers all the delightful taste of vanilla without any alcohol content, making it suitable for a wider range of diets and preferences.
Unmatched Versatility in the Kitchen
Once you have your homemade vanilla powder, you'll discover its incredible adaptability. It seamlessly integrates into virtually any recipe where you'd typically use vanilla extract, paste, or beans. Think beyond just baking! Here are just a few ideas:
* **Baking:** Elevate cakes, cookies, muffins, and breads.
* **Desserts:** Infuse custards, puddings, ice creams (like DIY Vegan magnum ice creams), and whipped creams with a profound vanilla note.
* **Beverages:** Stir into coffee, tea, hot chocolate, smoothies, or even homemade lattes for an instant flavor boost.
* **Flavoring:** Create exquisite vanilla sugar by combining it with granulated sugar, perfect for sprinkling over fruit or adding to hot drinks.
* **Savory Dishes:** A subtle pinch can even enhance glazes for certain meats, adding an unexpected layer of complexity.
For more insights into the zero-waste benefits and potent flavor boost, check out our guide on
How to Make Vanilla Powder: Zero-Waste & Potent Flavor Boost.
The Essential Ingredients & Equipment for Your DIY Vanilla Powder
The beauty of making your own vanilla powder lies in its simplicity, requiring minimal ingredients and basic kitchen tools.
Key Ingredient: Quality Vanilla Beans
The cornerstone of exceptional vanilla powder is, naturally, high-quality vanilla beans. Different origins offer distinct flavor profiles:
* **Madagascar (Bourbon) Vanilla:** The most common, known for its classic, rich, creamy, sweet flavor.
* **Tahitian Vanilla:** More floral, fruity, and aromatic.
* **Mexican Vanilla:** A smoky, spicy, and woody note.
Choose plump, moist beans that are flexible and fragrant. The quantity will depend on how much powder you want to make, but starting with 5-10 beans is a good way to begin.
Essential Equipment:
*
Baking Sheet: Lined with parchment paper for drying in the oven.
*
Oven (Optional): For expedited drying.
*
Spice Grinder, Coffee Grinder, or High-Speed Blender: This is crucial for achieving a fine, consistent powder. A dedicated spice grinder works best to avoid transferring coffee or other spice flavors.
*
Airtight Container: For long-term storage of your finished powder.
Step-by-Step Guide: *Diy How to Make Vanilla Powder* at Home
The process of transforming whole vanilla beans into a fragrant powder is straightforward, primarily involving two main stages: drying and grinding.
Step 1: Preparing and Drying Your Vanilla Beans
Properly drying the vanilla beans is the most critical step. If the beans aren't thoroughly brittle, they simply won't grind into a fine powder. They'll become a sticky paste, rendering the next step impossible.
*
Method 1: Air Drying (The Natural, Patient Approach)
If you're not in a hurry, this method is entirely hands-off. Simply lay your vanilla beans out on a clean counter or a wire rack in a well-ventilated area, away from direct sunlight or excessive humidity. Over the course of 1 to 2 weeks, they will naturally shrivel, harden, and become incredibly brittle. This slow process allows the natural oils and aromas to concentrate beautifully.
*
Method 2: Oven Drying (The Expedited Method)
For quicker results, the oven is your best friend.
- Preheat your oven to its lowest setting, typically around 50°C (120°F) to 75°C (170°F).
- Arrange the vanilla beans in a single layer on a baking sheet lined with parchment paper.
- Bake for approximately 1.5 hours at 50°C, or 60-90 minutes at 75°C, or until they feel significantly drier and stiffer.
- Even after removing them from the oven, they might still feel somewhat pliable. Don't worry! As they cool down to room temperature, they will continue to firm up and become perfectly brittle.
*
Method 3: Microwave (Use with Caution)
While some sources suggest microwaving, many home cooks, including myself, prefer slower, more natural methods to preserve the delicate vanilla essence. If you choose this route, microwave the beans in short 30-second bursts, allowing them to cool between intervals, until they are dried and brittle. However, be mindful that rapid heating can sometimes alter the subtle nuances of the vanilla flavor.
Regardless of the method you choose, *ensure your beans are completely dry and snap easily* before moving to the next stage. This brittle texture is key to a smooth powder.
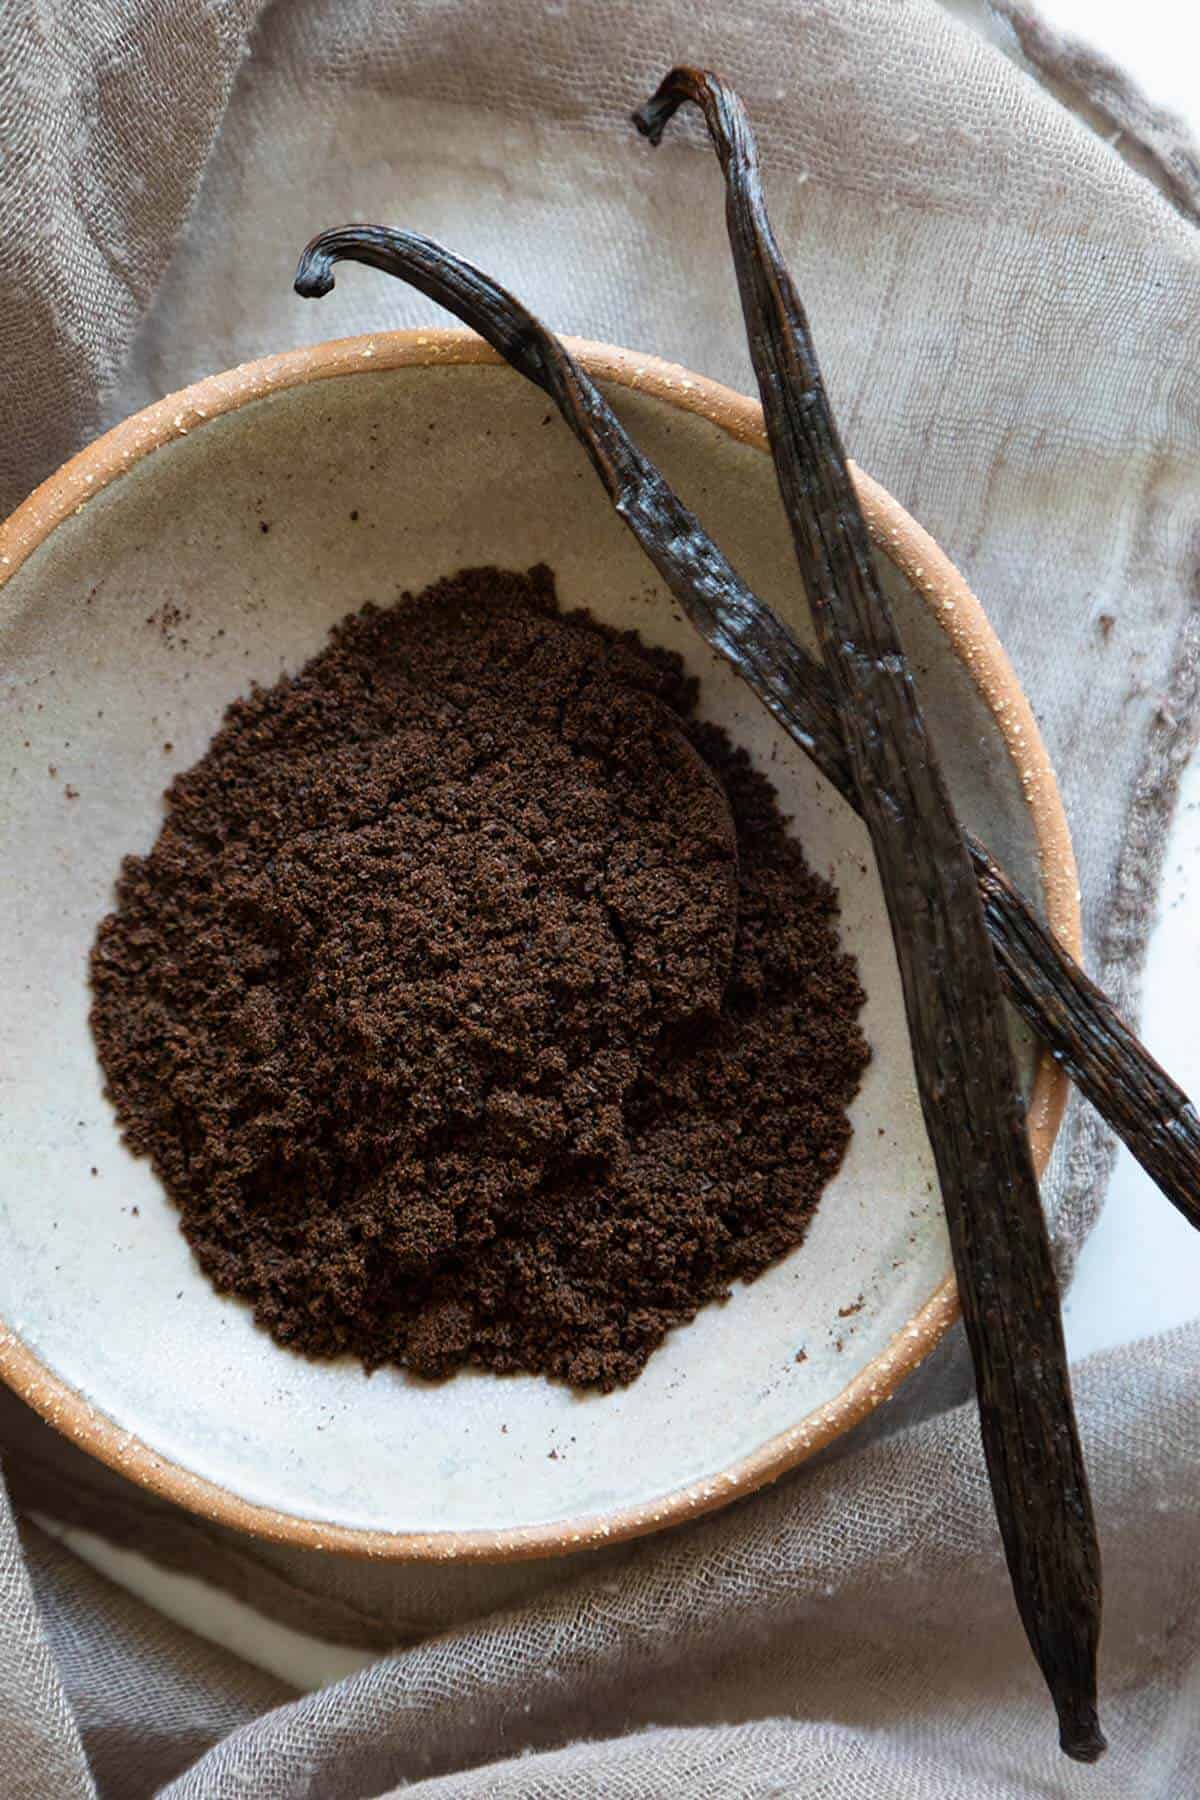
Step 2: Grinding Your Dried Vanilla Beans into Powder
Once your vanilla beans are dried to perfection, it’s time for the transformation!
1.
Break if Needed: If your beans are very long, you might want to break them into smaller pieces to fit comfortably into your grinder.
2.
Grind: Place the brittle vanilla beans into your chosen spice grinder, coffee grinder, or high-speed blender.
3.
Process until Fine: Pulse and grind the beans until they transform into a very fine, consistent powder. This may take a minute or two, depending on your grinder. If you notice any larger flecks, continue grinding. The goal is a texture similar to confectioners' sugar.
4.
Zero-Waste Perfection: Marvel at how the entire bean, from skin to seeds, has been utilized, leaving you with a rich, aromatic powder.
Remember to clean your grinder thoroughly afterward to prevent any flavor transfer to subsequent ingredients.
Storing Your Homemade Vanilla Powder for Lasting Freshness
Proper storage is crucial to maintaining the potency and aroma of your freshly made vanilla powder.
Once ground, transfer your vanilla powder to a clean,
airtight container. A small glass jar with a tight-fitting lid is ideal. Store this container in a
cool, dark place, such as a pantry or cupboard, away from direct sunlight and heat fluctuations.
When stored correctly, your homemade vanilla powder can retain its exquisite flavor and aroma for up to
one year.
Important Storage Note: Avoid Refrigeration!
It might be tempting to refrigerate your vanilla powder, thinking it will prolong its freshness. However, this is a common misconception and will actually do more harm than good. Refrigeration can introduce moisture, which will clump the powder, and it can also negatively affect the delicate essential oils within the vanilla, diminishing its flavor and aroma. Stick to a cool, dry, dark cupboard.
If you're looking for a simple, alcohol-free alternative that's more potent than extract, delve into
DIY Vanilla Powder: Simple, Alcohol-Free & More Potent Than Extract.
Creative Ways to Use Your DIY Vanilla Powder
With your fresh batch of vanilla powder, the culinary possibilities are endless. Here are a few inspiring ideas to get you started:
*
Baking: Incorporate it directly into dry ingredients for cakes, cookies, muffins, and quick breads. Its heat stability ensures full flavor.
*
Drinks: Stir a pinch into your morning coffee, tea, or hot chocolate for an instant gourmet upgrade. It also blends beautifully into smoothies.
*
Desserts: Whisk into homemade custards, puddings, or the base of ice cream. Sprinkle over fresh fruit or a bowl of yogurt.
*
Vanilla Sugar: Combine 1-2 tablespoons of vanilla powder with 1 cup of granulated sugar. Store in an airtight container for a week to allow flavors to meld, then use it in place of regular sugar in recipes or to sweeten beverages.
*
Whipped Cream: Add a touch to homemade whipped cream for an extraordinary dessert topping.
*
Pancakes & Waffles: Mix into your batter for a fragrant breakfast treat.
*
Homemade Seasoning Blends: Add a unique, sweet depth to spice rubs for certain meats or sweetening savory sauces.
A good rule of thumb is to start with half the amount of vanilla powder you would use for liquid extract and adjust to taste. Its concentrated nature means a little goes a long way!
Conclusion
Making your own vanilla powder is a rewarding endeavor that offers a multitude of benefits, from superior flavor and potency to sustainability and versatility. By understanding the simple steps of drying and grinding, you gain control over the quality and purity of your vanilla, creating a zero-waste, alcohol-free ingredient that will elevate every dish it touches. So, gather your vanilla beans, follow this guide on *diy how to make vanilla powder*, and prepare to unlock an unparalleled depth of pure vanilla flavor in your kitchen. Happy cooking!